A pouch that starts lifting at the edge, itching under the barrier, or leaking near the stoma needs attention before it becomes a bigger skin problem. Learning how to change a urostomy pouch gives you more control over daily care, whether you are managing your own urostomy or helping a family member at home. With the right supplies and a consistent routine, the process can become more comfortable and predictable.
Before You Change a Urostomy Pouch
Choose a time when urine output is typically lower if possible, such as before drinking a large amount of fluids. There is no need to restrict fluids unless your clinician has told you to do so. Urostomies drain urine continuously, so having everything within reach helps you work efficiently.
Wash your hands and set up on a clean, dry surface. If you are changing the pouch while standing, keep a small towel or disposable pad nearby to catch urine. Many people prefer changing their system after a shower, while others find it easier to work at a counter with a mirror. The best approach is the one that lets you clearly see the stoma and apply the barrier without rushing.
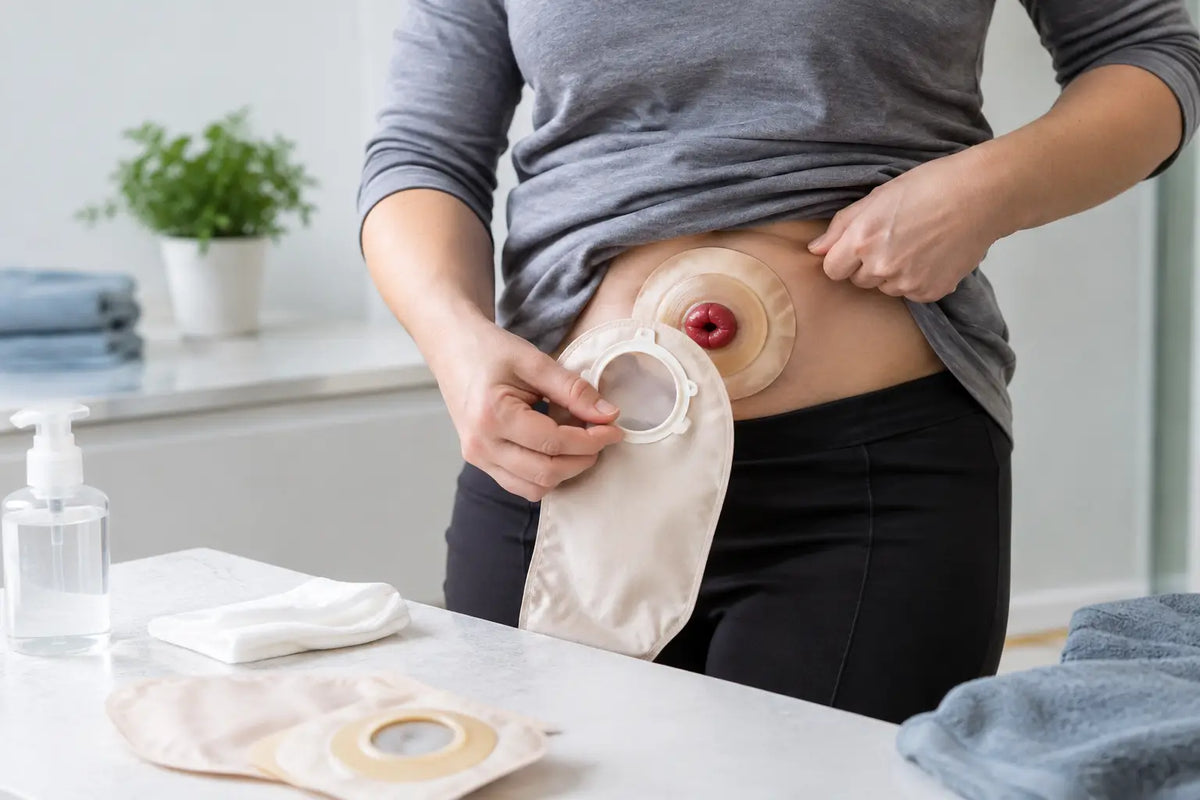
Gather the supplies recommended for your system. Common items include:
- A new urostomy pouch or pouching system
- A skin barrier or wafer, if using a two-piece system
- Measuring guide and scissors, if your barrier is cut-to-fit
- Soft washcloths or gauze and warm water
- Adhesive remover wipes or spray, if needed
- Skin barrier wipes, powder, rings, or paste recommended by your ostomy clinician
- A disposal bag and a clean towel or absorbent pad
How to Change a Urostomy Pouch Step by Step
Empty the pouch first
Start by draining the pouch into the toilet. A lighter pouch is easier to handle and less likely to spill during removal. Close the drainage outlet according to the product instructions before moving to the next step.
If you use a nighttime drainage bag, disconnect it carefully and clean the connector as instructed by the manufacturer or your clinician. Check that the pouch outlet is fully closed before applying the new system.
Remove the old barrier gently
Support the skin with one hand while slowly peeling the adhesive away with the other. Pull the barrier downward and away from the skin rather than tugging it outward. Adhesive remover may make this more comfortable, especially if your skin is tender or the barrier is firmly attached.
Avoid pulling quickly. Slow removal can help prevent skin stripping, which may leave the area sore, red, or more likely to leak with the next application. Place the used pouch and barrier in a disposal bag. Do not flush ostomy supplies.
Check the stoma and surrounding skin
A healthy stoma is usually moist and pink to red. It may bleed slightly when wiped because stoma tissue has a rich blood supply. A small spot of blood that stops quickly is often not a concern.
Look closely at the peristomal skin, meaning the skin around the stoma. It should look similar to the skin on the rest of your abdomen. Persistent redness, open areas, itching, weeping skin, or a rash may mean urine has been getting under the barrier or that a product is irritating your skin.
Clean and dry the area
Use warm water and a soft cloth, gauze, or paper towel to clean the stoma and surrounding skin. Mild soap can leave residue that interferes with adhesion, so plain water is often enough unless your care team has recommended a specific cleanser. Avoid lotions, oils, powders, and fragranced products unless they are designed for ostomy care.
Pat the area completely dry. A barrier will not adhere well to damp skin, and moisture trapped beneath the adhesive can contribute to leakage and irritation.
Measure the stoma and prepare the barrier
Stoma size can change after surgery, especially during the first several weeks or months. Use the measuring guide that came with your supplies rather than assuming the opening is still the same size. For a cut-to-fit barrier, the opening is often cut close to the stoma, commonly about one-eighth inch larger. Follow the instructions provided by your ostomy nurse and your specific product manufacturer.
An opening that is too large exposes skin to urine. One that is too small can rub the stoma or restrict it. If you are having frequent leaks, a barrier ring, paste, or a different barrier shape may help, but it is best to discuss repeated problems with an ostomy nurse before changing your whole routine.
Apply the new pouching system
If you use a barrier ring or paste, apply it as directed around the stoma opening. Remove the backing from the skin barrier and center the opening over the stoma. Press the barrier into place, starting near the stoma and smoothing outward. Hold your hand over the barrier for about a minute. Gentle warmth can help the adhesive form a better seal.
For a two-piece system, attach the pouch securely to the barrier. Run your fingers around the connection to confirm it is fully engaged. Make sure the drainage outlet is closed and positioned where you can comfortably reach it.
Before getting dressed, check for wrinkles, gaps, or lifted edges. A good seal should feel secure without pinching, pulling, or pressing painfully on the stoma.
Getting the Fit Right Matters
Frequent leaking is not something you should simply accept. The right urostomy pouch is only one part of the fit. Your abdominal contours, stoma height, skin condition, activity level, and whether the stoma sits near a crease can all affect which barrier works best.
Flat barriers work well for many people, while convex barriers can help create a more reliable seal for a flush or retracted stoma. Convexity creates pressure around the stoma, so it should be selected with guidance from an ostomy nurse or clinician. Belts, barrier rings, strips, and paste can also be useful, but adding products without addressing the cause of a leak can make care more complicated.
Most pouching systems are changed on a regular schedule, often every few days, but the right schedule depends on wear time, your skin, and product directions. Change the system sooner if it leaks, loosens, burns, or causes itching. Waiting for a barrier to fail can expose the skin to urine and make the next change more difficult.
Protecting Peristomal Skin Between Changes
Skin discomfort is often the first sign that the seal is no longer working. Urine is irritating to skin, even if a leak is small or hidden beneath the barrier. If you notice itching or burning, inspect the system rather than trying to wait until your usual change day.
For minor irritated areas, an ostomy clinician may recommend a skin barrier powder followed by a barrier wipe to create a dry protective layer. This technique is not appropriate for every issue, particularly if there is a spreading rash, infection, or allergic reaction. If your skin does not improve after adjusting your routine, get professional guidance.
Keep a simple note of what changes when problems happen. Record the type of barrier, wear time, location of leaks, skin symptoms, and whether you used accessories. This information can make it much easier for a clinician to recommend a better-fitting system.
When to Call Your Ostomy Nurse or Clinician
Contact your care team if you have repeated leaks, persistent bleeding, worsening skin breakdown, severe pain, or a stoma that changes to dark red, purple, gray, or black. Also seek guidance if the stoma becomes unusually swollen, stops producing urine, or if you have fever, flank pain, cloudy or foul-smelling urine, or other possible signs of a urinary infection.
A little mucus in the urine can be normal with a urostomy, particularly when a section of intestine was used to create the urinary diversion. However, new symptoms or a major change from your usual pattern deserve a call to your clinician.
Keeping the right pouching system, skin barriers, drainage supplies, and backup accessories on hand makes routine care less stressful. CartHealth helps simplify ongoing home health purchasing, so you can reorder familiar ostomy supplies before your last box is open. A calm, well-prepared pouch change protects your skin and helps you get back to the rest of your day with confidence.